iPhone Photography Workflow: Inside the Votiv Church
The Votiv Church is a neo-gothic church in Vienna and one of the most beautiful churches here. Its construction took almost 26 years and was finished in 1879. In this blog post, I’ll share my thoughts about how and why I composed the image this way, how I shot and edited it with my iPhone XS.
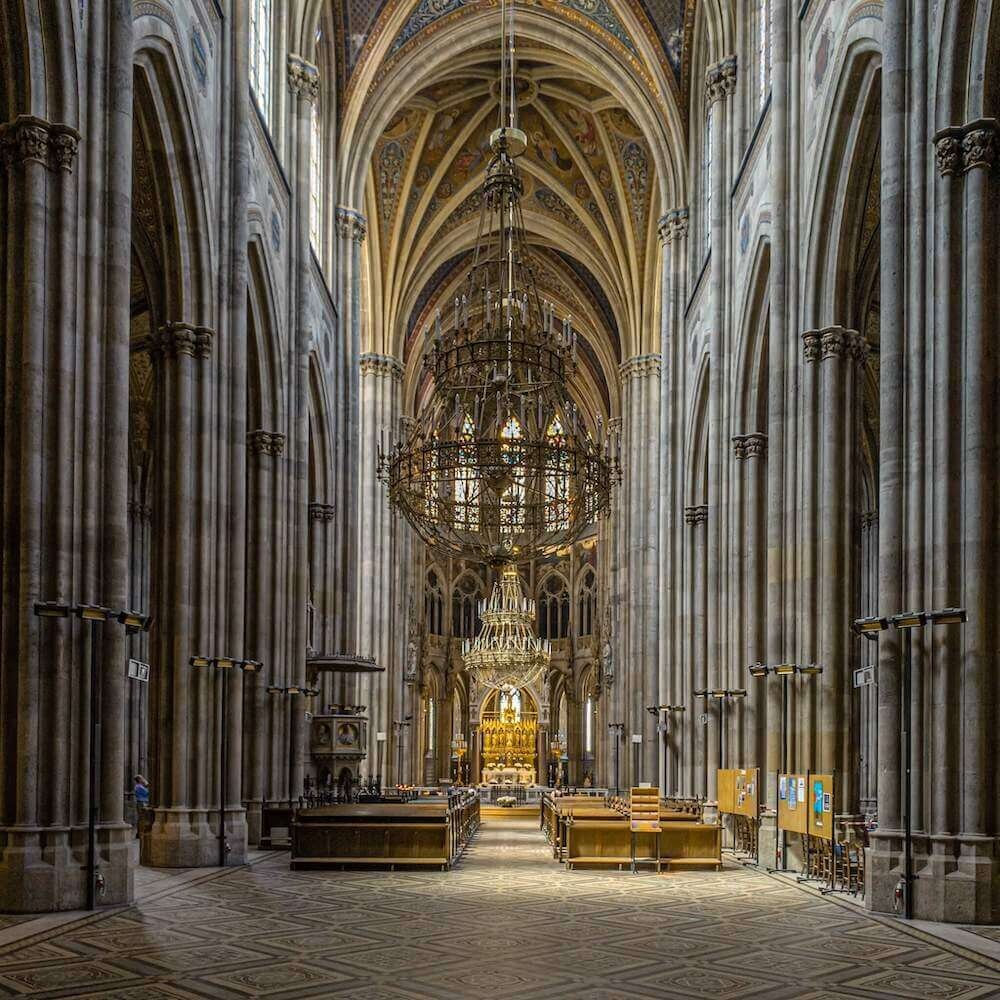
Inside Votiv Church, Vienna, Shot on iPhone XS
And here's a photo taken outside of Votiv Church

Votiv Church, Vienna, Shot on iPhone XS
Composition
The Votiv church is so huge. I also like the simplicity of the interior with the pure stone pillars on both sides of the central aisle. It’s totally in contrast to St. Stephans cathedral. There you’ll find lots of statues, ornaments and other decoration everywhere in the church.
I used a symmetrical composition using the pillars as leading lines that guide the eye towards the background and the golden altar. A symmetrical composition like this is one option to convey distance and size.
Lastly, I wanted to get as much of the ceiling into the frame as possible. That’s why I placed the floor only on the lower third of the frame. So basically, I applied the rule of thirds here.
Shooting
To capture all the space inside, I used the Moment Wide Lens with my iPhone XS. With the Moment Wide Lens, I was able to place the pillars precisely at the edge of the frame. Moreover, a wide lens pushes back the background a bit so the viewer can really get an impression of how massive this church is.
As you can see from the original, unedited, RAW photo, it was quite dark inside, and especially the left side has a lot of shadows. This is one of the scenarios where I shoot RAW with iPhone.

Unedited RAW in Lightroom Mobile
By shooting RAW, I avoid any automatic noise reduction and exposure adjustments by the iOS stock camera app. I can increase the exposure, brightness, and lift the shadows in Lightroom Mobile myself without sacrificing image quality.
Plus, the noise reduction in Lightroom Mobile is way better than what you’d get from automatic noise reduction when using JPG.
To shoot this dark scene without a tripod, I used a ProCamera feature called anti-shake shutter release. You can find it in ProCamera under settings and anti-shake. I placed the anti-shake shutter release as a secondary shutter release button right near the main shutter release.

Anti-Shake Shutter Release in ProCamera App
To place the anti-shake shutter release button near the main shutter release instead of the self-timer:
- Tap menu. It’s the rightmost icon in the lower toolbar
- Tap anti-shake so it turns blue.

Enable Anti-Shake Shutter Release in ProCamera App
With anti-shake shutter release, I press the shutter release, and ProCamera will take the photo only if I hold the camera steady enough. Moreover, ProCamera will even wait until I hold it steady enough.
That helps a lot when shooting with a manual setting of ISO 25 and an exposure time of 1/15 without a tripod like in this scene.
Editing
First thing I did is to fix perspective distortion to make the pillars parallel to the edges of the frame. Setting the vertical slider under Geometry to -30 was perfect for this scene. To fill the frame again, I had to adjust the y-offset a bit, too.
Next, I fixed the exposure and light by increasing the exposure by 1 step (+1) and lifting the shadows by +90. Next, I turned down the highlights by -90, reducing the highlights. This way, I get details back in the highlight areas.
To bring out more details, especially in the pillars, I increased clarity and texture.
Finally, I zoomed in to one of the pillars and tried to find the sweet spot for noise reduction to eliminate as much noise as possible while still retaining detail. It’s always a bit of a trade-off when you use noise reduction. Using too much will kill your noise but also all of the details.
Finally, I sharpened the image with masking set to +90 to ensure only the edges are sharpened.
Summary
When it comes to shooting in low light conditions (especially without a tripod) I have to decide between using ProCamera Low Light Modes or shooting RAW with iPhone and then adjusting the photo in Lightroom.
It really depends how dark the scene is and if I use a tripod or not. If I'm able to shoot the scene with an exposure time of up to one second, which is the most you can get from ProCamera in manual mode, I shoot RAW. If it's so dark I'd need a longer exposure time, I'd turn to ProCamera Low Light Modes.
Care about some quick feedback about this article?

It's helpful

I still have a question

Not what I was looking for