iPhone Photography Workflow: Reflection of Castle Riegersburg
I spent a few days in the beautiful volcano land in Styria. Styria is also known as the "green county" of Austria. As usual, I uploaded a few photos to Flickr, and this one was chosen for Flick Explore the next day. So I thought I'd share the how, why, and what about this photo. Enjoy!
What can we see in this photo?
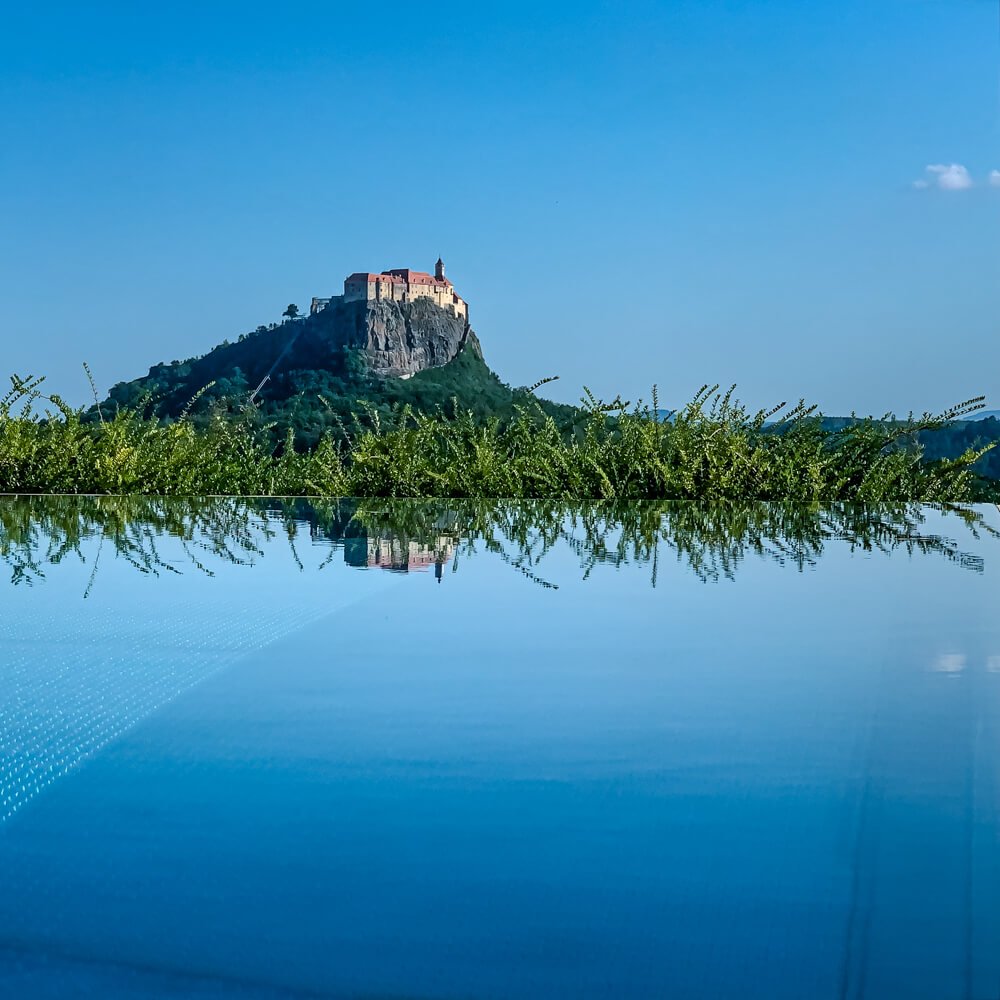
Castle Riegersburg in Styria, Austria
The photo shows Castle Riegersburg, a medieval castle that dates back to the 12th century. It's located on top of a dead volcano at the height of 1200 feet. The castle is still maintained. You can visit it and see a massive collection of props from the middle age, most notably is the white room and a quite huge armory, full of armor, lances and other medieval whatnots.
Where did you take this photo?
I took the photo from a nearby hotel where I stayed for a weekend getaway. The hotel is called the Genusshotel Riegersburg.
It's a beautiful hotel, built on a hillside. As a specialty, the hotel serves only food and drinks from the region. You won't get any coke there, instead, try a "Himberkracherl" (It's a carbonated drink made from raspberry. Very refreshing!). And of course, you'll get all the local wines here.
If you're looking for a weekend getaway, check the reviews and price of Genusshotel Riegersburg at booking.com
I took this photo from the hotel pool after I noticed the reflection of the castle in the pool.
How did you compose the image?
As I did my lengths in the pool, I noticed the reflection of the castle in the water. Lowering my perspective a little more to almost the surface level, I also realized that from this angle, the pool looked like an infinity pool with a beautiful reflection of the castle and the "scrub" at the end of the pool.
In fact, the scrub bothered me a little. But as I love to travel light and didn't bring my lawnmower and hedge clippers, I just had to take it as it is. And, honestly, I doubt the hotel would let me remove the hedge for the photo.
So I waited at the other end of the pool for the water to calm. Then, I saw the line from the lower-left corner that goes directly towards the reflection. That would make a perfect leading line to the main subject, which is the reflection of the castle.
The line comes from the different depths of the pool. It's more shallow on the left side, and it seems they used a different underground for the shallow area.
Lastly, I chose to place the horizon in the middle of the frame to create a symmetry as we have a blue sky and blue water. This is in contrast to what you learn in many photography classes which will teach you to place the horizon according to the rule of thirds. However, I did follow the rule of thirds by placing the castle towards the left edge of the frame.
Did you use any special iPhone photo accessories for this photo?
Short answer: no, except for the Moment Case, though I didn't use a Moment Lens for this photo. I used the case because it allows me to attach a wrist strap to it. And as I took the picture from inside the pool, I didn't want to "stress test" the water-resistance of the iPhone XS.
Of course, the iPhone XS got wet while I took this shot. And here's the most important thing I learned about the water-resistance of the iPhone:
- Yes, it is water-resistant
- Make sure your iPhone is fully charged before you go on such a photoshoot. iPhone can detect if the Lightning connector gets wet and it won't let you charge it until the connector is completely dry. If you try to charge it, a warning will pop up on iPhone telling you that it has detected moisture in the connector and thus disabled charging. Smart phone, isn't it?
Which camera app did you use to take the photo?
As always with such scenes, I used ProCamera app in RAW mode. The sun was bright on the horizon, and so I didn't need to switch to any particular mode. I used automatic mode for this one.
Which app did you use to edit the photo?
Because I shot this photo in RAW, I need to "develop" it. So I used my favorite RAW editor, Adobe Lightroom Mobile. Developing and editing RAW files is a premium feature of Lightroom.
I didn't do much editing in Lightroom. Just a few minor adjustments which are:
- Increased the highlights a bit
- Brightened the shadows
- Added some clarity
- Slightly increased dehire
- Set noise reduction
- Applied sharpening
That's it. Then I uploaded the photo right from Adobe Lightroom to Flickr and even Instagram.
Summary of composition rules, apps, and accessories for this iPhone photo

Photography composition rules
As for the composition rules, I used the following for this photo:
- Reflection. People seem to like reflections.
- An Optical illusion created by lowering my viewpoint to make a regular pool look like an infinity pool
- Leading Lines that lead the eye to the main subject
- Symmetry, because I placed it in the middle.
- Rules of thirds by placing the main item off the center towards the left edge.
To shoot and edit this photo, I used ProCamera App and Adobe Lightroom Mobile. I have a review of ProCamera App and a review of Adobe Lightroom here in the blog. To prevent the iPhone from slipping out of my hands into the water, I used a Moment Case with a wrist strap.
And finally, if you're curious, here's a post describing why I love the square photo format.
Any thoughts? Sound off in the comment area below
Care about some quick feedback about this article?

It's helpful

I still have a question

Not what I was looking for