How to do Night Photography with iPhone: Apps & Gear
Since I turned to iPhone photography in 2012, I have tried to find ways to make low noise and sharp photos at night with my iPhone. This blog post will outline three ways to do night photography with iPhone and show you which apps and accessories I use.
Table of Contents
- Sample night photos shot on iPhone
- How night mode works: A high level explanation
- 3 Apps to take night photos with iPhone
- Do I need a tripod for night photography with iPhone?
- Tips for taking night photos shot on iPhone
- Summary
Sample night photos shot on iPhone
Before we have a look at the apps you can use for night photography with iPhone, let's have a look at these sample photos. I took them using the apps that I'll cover later in this blog post

View from the Shard at night shot on iPhone 6S Plus using ProCamera Low Light Mode

Music Theatre in Vienna during a lockdown shot on iPhone 11 Pro using night mode

Parliament in Budapest at night shot on iPhone Xs using Slow Shutter Camera App
All of the three camera apps I use for taking photos at night with iPhone have a dedicated low light or night mode. Slow Shutter Cam App was one of the first apps to offer such a night mode. Then came low light mode in ProCamera App and finally Apple released the night mode in the stock iPhone camera app.
From what I've learned, these night modes basically work similar.
How night mode works: A high level explanation
If you switch to night mode or low light mode in any of the below camera apps, then this camera app basically does two things:
- It takes several photos (sometimes even with different shutter speeds
- It layers and combines the photos into a single exposure
As noise occures randomly in a photo, layering multiple exposures basically allows you to completely eliminate noise that often occures in photos taken a t night. Moreover, similar to HDR, some algorithms will even improve the exposure.
Now let's have a lock at the three apps in more detail: iPhone Night Mode Camera, Slow Shutter Cam App and ProCamera App low light mode.
3 Apps to take night photos with iPhone
I use three different apps for night photography with iPhone: The stock iOS camera app with night mode, ProCamera with night mode, and Slow Shutter Cam App in night mode.
From the camera apps I use, you can see one important thing they have in common: For taking great photos at night with iPhone, you'll need a camera app that comes with a dedicated night mode.
Night mode of the iOS camera app
Apple introduced night mode with the release of the iPhone 11 and iOS 13. Night mode was originally only available for use with the standard wide lens. iPhone 13 and iOS 15 now allow you to use night mode with all three lenses (if you have a pro model). So, as of May 2022, night mode works with all iPhone 11, 12, and 13 models. To my knowledge, it does not work with iPhone SE models.
If the iPhone camera app detects a low light scene, it automatically enables night mode. That's indicated by a night mode symbol in the upper left corner of the screen that also displays the exposure time like 2 seconds in the screenshot below.

Night mode indicator in the iPhone’s stock camera app
You're ready to shoot if you see this night mode symbol and an exposure time. The exposure time the camera app displays is just for your info. You don't need to adjust it - though you can.
To show the exposure adjustment slider in night mode, tap the night mode icon in the upper left corner of the screen. Then this slider will appear at the bottom of the screen. Now you can manually adjust the exposure time suggested by the camera app.

Night Mode exposure slider
Note: The exposure adjustment slider is only available if night mode is enabled.
If you don't want to use night mode despite the camera app suggesting it, tap the night mode icon in the upper left corner.
To turn off night mode if the iOS camera app enables it:
- Tap the night mode icon to reveal the slider
- Move the slider to the left until it says off.
I usually use night mode for snapshots. When I'm shooting, I rely on the night mode of the ProCamera app because it provides a little more control.
ProCamera App: Low Light Mode
Even before Apple introduced night mode, my favorite third-party camera app, ProCamera, introduced several night modes that they call Low Light+. I've used them frequently since they were launched.

Vintage Style Cinema in Vienna at night shot on iPhone XS using ProCamera Low Light Mode
To enable Low Light+ in ProCamera, tap the mode selector to the left of the shutter release button and select low light+.
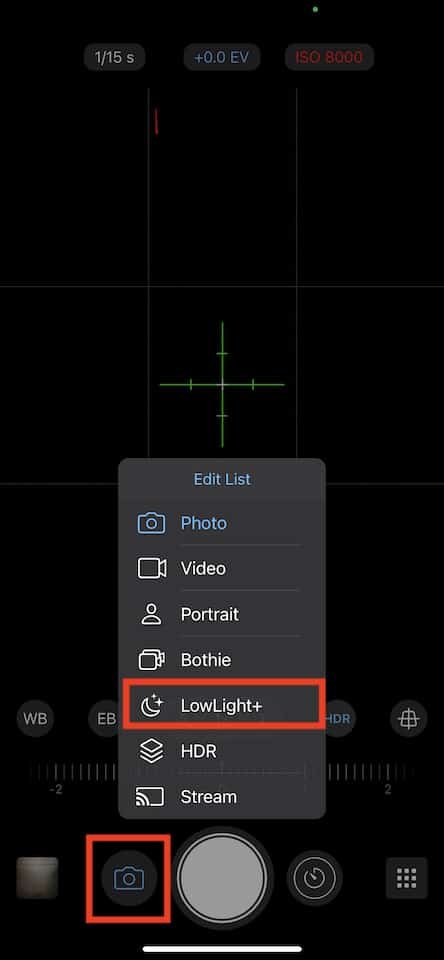
Enable Low Light+ in ProCamera App
I prefer ProCamera's low light mode because the app always displays the exposure adjustment slider, and I don't have to tap to see it. Using this slider, you can adjust the exposure time.

Enable Lux+ in ProCamera App
Did you notice the Lux+ icon on the left side of the screen? ProCamera will apply an extra boost to the exposure time by tapping it and enables you to take well-lit photos in challenging low light situations. I use it mainly when photographing inside abandoned buildings.
To learn more, please head over to my ProCamera low light mode review.
Slow Shutter Cam App
Slow Shutter Camera App does what the name suggests: It lets you take long exposure photos with your iPhone. Slow Shutter Cam App has three different shooting modes:
- Motion Blur
- Light Trail
- Low Light
Please choose the Low Light mode to take photos in low light situations. Because I can manually adjust ISO and shutter speed, Slow Shutter Cam app is my preferred app for really challenging light conditions. You won't find that level of control in the stock camera app or the ProCamera app.

Parliament in Budapest shot on iPhone XS using Slow Shutter Cam App
Once you've chosen low light mode, set the noise reduction, shutter speed, and ISO. I generally recommend setting noise reduction to low and ISO to a value around 100 or even lower. If you set noise reduction to anything higher than low, you may kill all the fine details in your photo. If you set ISO to a value higher than 100, your image may be noisy.
The recommended shutter speed depends on the amount of light you have. There is no rule of thumb for this setting. I recommend taking a picture and then checking if you need to increase or decrease the shutter speed. Yes, it's a bit of a trial and error, but it's worth the effort.
I use Slow Shutter Cam app for night photography mainly for really difficult light settings when I need full control over settings like ISO and shutter speed.
I have posted a full Slow Shutter Cam App review earlier in my blog.
Do I need a tripod for night photography with iPhone?
The unsatisfactory answer to this question is: it depends. Suppose you photograph a nightly scene without any movements, like an illuminated building at night.
If you use the night mode of either the stock camera app or ProCamera App, you most likely won't need a tripod if the shutter speed is around 1 second. For any longer shutter speed, I strongly encourage you to use a tripod like the ultra-portable Joby Griptight magnetic or the Rollei Traveller No. 1. I use both of these two tripods. Read my Joby Griptight magnetic review or head to my review of the Rollei Traveller No. 1 tripod.
If you want to capture light trails, photograph a firework with iPhone or use Slow Shutter Cam App in general, you'll definitely need a tripod. Otherwise, your photos will be blurry.
Tips for taking night photos shot on iPhone
And finally, here are a few tips for editing your night photos taken with iPhone either with the Photos app or Adobe Lightroom mobile.
- Avoid light from the side of the frame like from a light post. If you can, move closer to your subject to avoid the light post.
- If you take a night photo in a city, the sky may look grayish instead of black. Experiment with contrast and/or the black point to make the sky black again. If you use Lightroom Mobile, let Lightroom detect the sky. To make it black, reduce the exposure of the sky's mask.
- If you sharpen your night photo in Lightroom, use a mask! Otherwise, you may also sharpen and thus bring out noise in black areas like the sky.
- The same applies to clarity and texture in Lightroom Mobile. Apply them carefully and use a mask to apply them to the main subject only.
- Some cities turn off external illuminations for buildings late at night. Be prepared. Scout the locations before going there to shoot it.
- the Best time to photograph a city at night is when everyone else is sleeping. Depending on the city, 1am or 2am from Mondays to Thursdays is a good time.
Summary
Thanks to the power of the iPhone and smart developers, taking well-lit and low noise photos with iPhone is possible. You can use one of the three apps I've mentioned above:
- For occasional night photos, I recommend sticking with night mode of the iOS camera app
- For more control and if you're shooting, give LowLight mode of the ProCamera app a try
- For complete control over shutter speed and ISO for night photography, try Slow Shutter Cam App.
Care about some quick feedback about this article?

It's helpful

I still have a question

Not what I was looking for