Review of the Neewer iPhone cage. It’s a versatile rig for photography
The Neewer iPhone cage is one of my favorite iPhone photo accessories. It allows me to attach side handles for a more camera-like feeling or even lights for photographing in dark, lost places. I can also easily attach it to a tripod without the need for an additional iPhone tripod mount adapter.
In this Neewer iPhone cage review, I’ll explain why I bought an iPhone cage and write about my experience of using it since the iPhone 15 up to the new iPhone 17.
Table of Contents
- Why I Bought the Neewer iPhone Cage
- Sample Photos I took while using the Neewer iPhone Cage
- Features of the Neewer iPhone Cage
- How to use the Neewer iPhone cage
- Summary and would I buy it again?
Why I Bought the Neewer iPhone Cage
I bought the iPhone Cage mainly for my trip to Ireland after Jack I bought the iPhone Cage mainly for my trip to Ireland after I saw Jack Hollingsworth mentioning it on Twitter/X. And I bought it for the following reasons:
I can attach a handle to each side of the Neewer iPhone cage. That makes it easy to hold even during strong winds like in Ireland.
I use one handle with a built-in shutter release that connects to iPhone via Bluetooth. That makes the iPhone easier to operate.
The Neewer Rig has 10 (!) standard ¼ inch screw holes. So I can attach photo accessories like a light or mount it to a tripod. No need to carry an extra iPhone tripod mount adapter anymore.
I can attach a wrist strap or even a neck strap to the Neewer iPhone cage.
It’s made of metal and thus adds a great layer of protection to my iPhone.
Basically, the Neewer iPhone cage turns my iPhone into a versatile rig for photography. I’ve used it with all iPhone models starting with the iPhone 15 Pro Max up to the iPhone 17 Pro Max so far.
This updated review is about the Neewer PA143/PA144 Phone Cage for iPhone 17 and iPhone 17 Pro Max.
Let’s take a look at the features of the Neewer iPhone Cage in more detail and how they performed during my various trips.
Sample Photos I took while using the Neewer iPhone Cage
I’ve used the Neewer iPhone Cage during my road trip through Ireland and in two lost places. Here are some sample photos I took while using this rig.

Kerry Cliffs, Ireland

Abandoned control room, Berlin

Abandoned hangar, Berlin
The cage was especially useful when taking the photos at the carry cliffs during a windy condition. I also loved that I could attach a light to the rig that helped me to take photos in an abandoned bunker in total darkness.
Features of the Neewer iPhone Cage
Neewer sells two different types of iPhone cages: one fits the iPhone tightly and also acts as a protective frame, and one that basically acts as just a holder for the iPhone using a MagSafe mount.
As I don’t trust a MagSafe mount, I bought the first one that fits the iPhone tightly, which this review is about.
The tightly fitting iPhone case adds a 0.3-inch-thick protective layer of solid steel around your iPhone. That’s a lot more than many (any?) iPhone cases will add.
The disadvantage is that you’ll have to buy a new, tightly fitting iPhone cage whenever Apple releases a new iPhone model that has a different size compared to the previous one.
Weight and Dimensions
The Neewer iPhone cage weighs just 135g. I’ve never noticed this additional weight during my trips so far. The dimensions of the cage are 6.6 x 3.6 x 0.7 inch.
10 standard ¼ inch screw holes
The Neewer iPhone cage has a total of 10 (!) standard ¼ inch screw holes. There are three at the bottom and top (long side) of the cage and two on each (short) side of the cage.
Features of the Neewer iPhone Cage
Neewer sells two different types of iPhone cages: One fits the iPhone tightly and also acts as a protective frame, and one which basically acts as just as a holder for the iPhone using a MagSafe mount.
As I don’t trust a MagSafe mount, I bought the first one that fits the iPhone tightly, which this review is about.
The tightly fighting iPhone case adds a 0.3 inch thick protective layer of solid steel around your iPhone. That’s a lot more than many (any?) iPhone cases will add.
The disadvantage, however, is, that you’ll have to buy a new tightly fitting iPhone cage whenever Apple releases a new iPhone mode. But I had to do that for the Moment case as well.
Weight and Dimensions
The Neewer iPhone cage weighs just 135g. I’ve never noticed this additional weight during my trips so far. The dimensions of the cage are 6.6 x 3.6 x 0.7 inch.
10 standard ¼ inch screw holes
The Neewer iPhone cage has a total of 10 (!) standard ¼ inch screw holes. There are three at the bottom and top (long side) of the cage and two on each (short) side of the cage.

Neewer iPhone cage (for iPhone 16 Pro Max)
So you can attach plenty of iPhone photo accessories to it, as the ¼ inch screw is a pretty standard size for photo accessories.
In my usual setup, I use the one on the left side to attach the Neewer grip with the shutter release. If I photograph in a lost place, I also attach a video light at the top. In windy situations, I’ll add a second grip to the right. And if I need a tripod, I can attach it to one of the screw holes at the bottom.
Attach a wrist-strap where you want
Next to the lower-right corner of the cage is a recess for attaching a wrist strap. If that’s not conveniently located for you, get yourself a ¼ ring-screw like seen in the photo below and attach the wrist strap to it.
This way, you can mount the wrist strap to any of the other 10 standard ¼ screw holes.

Two ways to attach a wrist strap to the Neewer iPhone Cage
Attach two grips to the iPhone cage
Because of the 10 ¼ inch screw holes, you can attach two grips to the Neewer cage. I used that often during my trip to Ireland. Because of the wind, especially at the cliffs, I simply couldn’t use a tripod.

Neewer iPhone Cage with two grips attached
By attaching two grips, I could hold my iPhone tightly and steadily even during blustery conditions. Best of all, you can buy a grip directly from Neewer that comes with a Bluetooth shutter release. That’s the right grip in the above photo. You’ll need to charge it using USB-C. Any power bank will work.
I've been using the handles and the remote shutter release grip since the iPhone 15 Pro Max, and I still use them with the iPhone 17 Pro Max and the new cage. There's no need to buy a new version even if you upgrade your iPhone.
Cold shoe mount
As you can see on the image in the last chapter, the iPhone cage has a cold shoe mount. It’s located in the upper right corner of the cage. Additionally, when you purchase the grip with the remote shutter release, you get an additional cold shoe mount on the grip. Use these cold shoe mounts to e.g. attach a microphone or a video light.
Attach a light
When I’m photographing in a lost place, I tried several video lights with MagSafe mounts in the past. They didn’t convince me. The magnets were so weak, that the light fell off easily. Especially when I had the iPhone dangling from my wrist because I needed to use my flashlight.

Neewer iPhone cage with wrist-strap, light and grip with remote shutter release
With one of the 10 ¼ inch screws, you can attach one (if not multiple) video lights to illuminate the darkest areas of lost places (or wherever you take photos with iPhone).
The above photo shows my usual setup when I photograph in lost places using an iPhone: the Neewer iPhone cage, the grip with a shutter release, the wrist strap and the video light.
Mounting plates for third-party lenses
If you use or plan to use third-party lenses, the Neewer iPhone cage has you covered. It comes with two mounting plates. These plates allow you to use various third-party lenses. I’ve tested it with the latest ultra-wide lens from Moment and the tele-lens from Sandmarc.
Protective rubber for the camera button
The iPhone 17 Pro Max version of the Neewer camera cage comes with a protective rubber inlay that you can easily remove. It's the orange part you can see in at the top of this image.
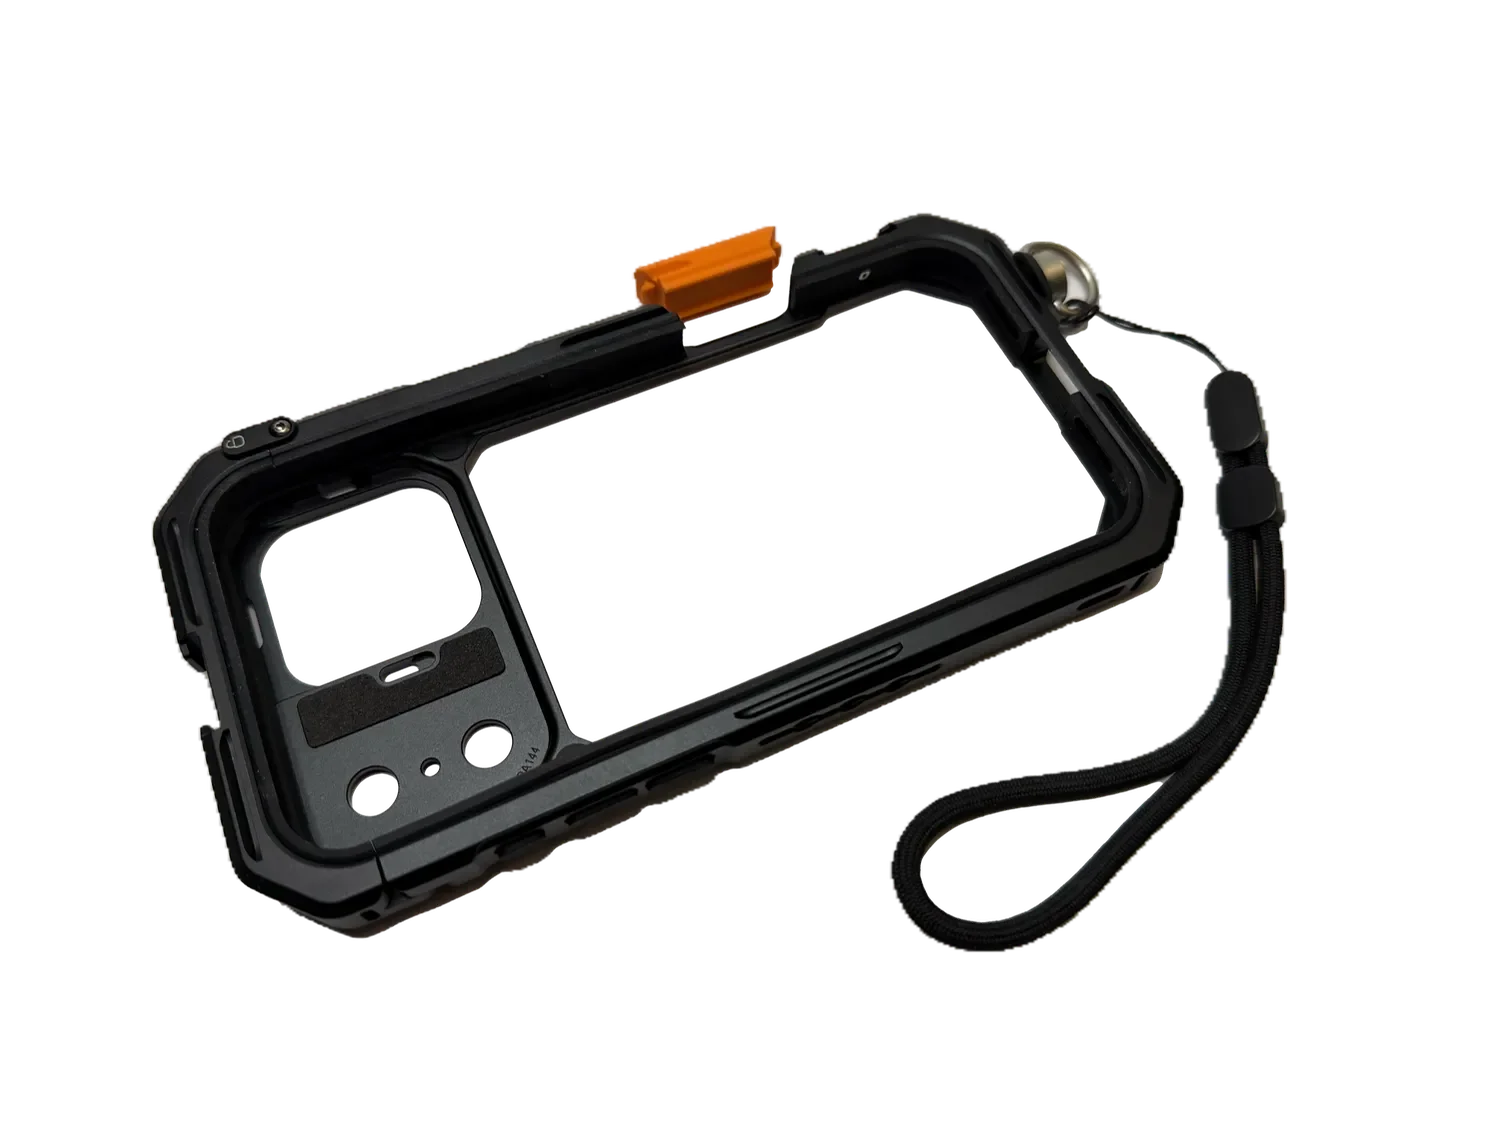
Protective rubber (orange) for the iPhone camera button
I'll probably never remove it, because I rarely use the iPhone camera button. And if I use the camera cage, I usually have the handle with the remote shutter release button attached.
How to use the Neewer iPhone cage
The Neewer iPhone cage is simple to use. Open the flap on the left, slide your iPhone into the Neewer cage and close it. There’s a small locking bolt to lock the flap and to prevent the iPhone from falling out.

Neewer iPhone cage with openend flap to insert iPhone
Summary and would I buy it again?
Yes, I’d buy the Neewer iPhone cage again. In fact, I've bought one for each new iPhone model since the iPhone 15 Pro Max. The one for the iPhone 17 Pro Max just arrived, and thus I 've updated the review.
The 10 ¼ inch holes allow you to easily and conveniently attach all sorts of iPhone photo accessories to the cage. You can even mount it to a tripod without the need for an additional and separate iPhone tripod mount.
The Neewer deal with a shutter release also makes taking photos with an iPhone more convenient.
Finally, the ability to attach a wrist strap almost everywhere around the cage adds an extra layer of security.
However, there’s also one (in my opinion) minor disadvantage of putting your iPhone into a steel cage: it blocks the cell phone signal slightly. I experienced that in a remote location in Ireland. When the phone was in the cage, I had no cell phone reception. Once I took it out, I got one bar. But as I said, that's a minor disadvantage in my eyes because you can easily fix it by removing the cage from your iPhone.
You can get the Neewer iPhone cage with lens mount (for different iPhone models) directly from Amazon. The Neewer grip with remote shutter release is also available from Amazon. And if you want the grip without remote shutter release, you can get it from Amazon, too.
Care about some quick feedback about this article?

It's helpful

I still have a question

Not what I was looking for